
As more companies embrace remote and hybrid work model, our homes and personal spaces have become our offices.
However, not everyone has a dedicated workspace or a tidy background for video calls. If you use Microsoft Teams though, you’re in luck. You can blur the background permanently.
This gives you several advantages including:
- Privacy: Conceal sensitive or personal information in your surroundings.
- Professionalism: Keep the focus on you, not on distractions behind you.
- Reducing Distractions: Prevent colleagues from being distracted by movement or clutter in your environment.
In this post, we will find out how you can blur your background along with useful tips and limitations to it, if any.
Let’s begin.
Also Read: Best MS Teams Backgrounds
How To Blur Your Background in Microsoft Teams Permanently?

Microsoft Teams allows you to blur your background both before and during meetings.
Once set, your choice remains active for future calls until you change it, effectively making the blur setting “permanent” for all subsequent meetings.
Steps to Blur Your Background Before a Meeting
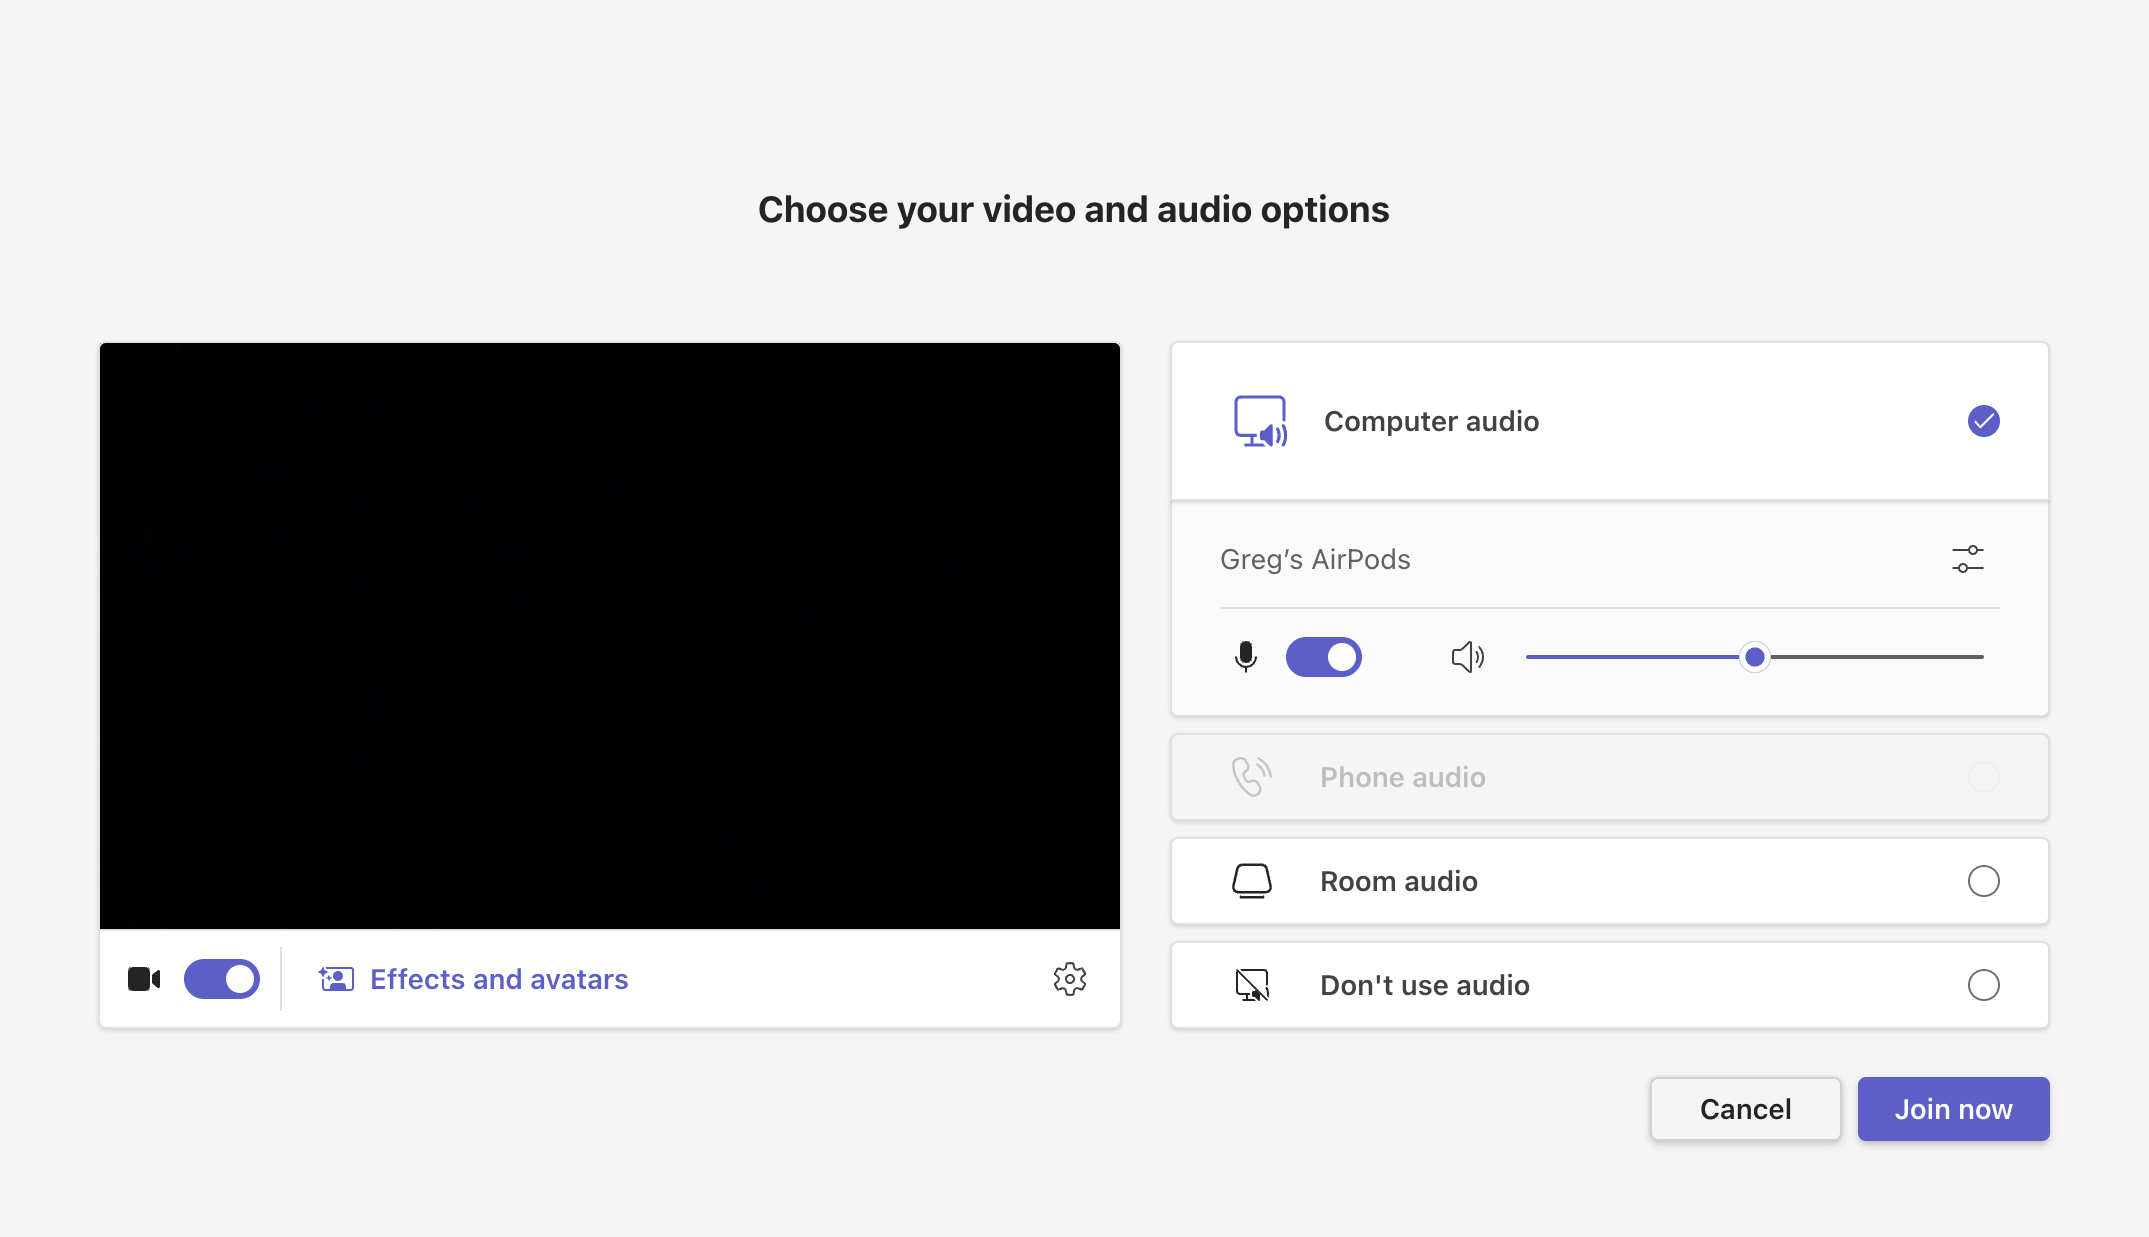
- Open Microsoft Teams and go to your calendar.
- Select the meeting you want to join and click Join.
![]()
- On the pre-join screen, turn on your camera.
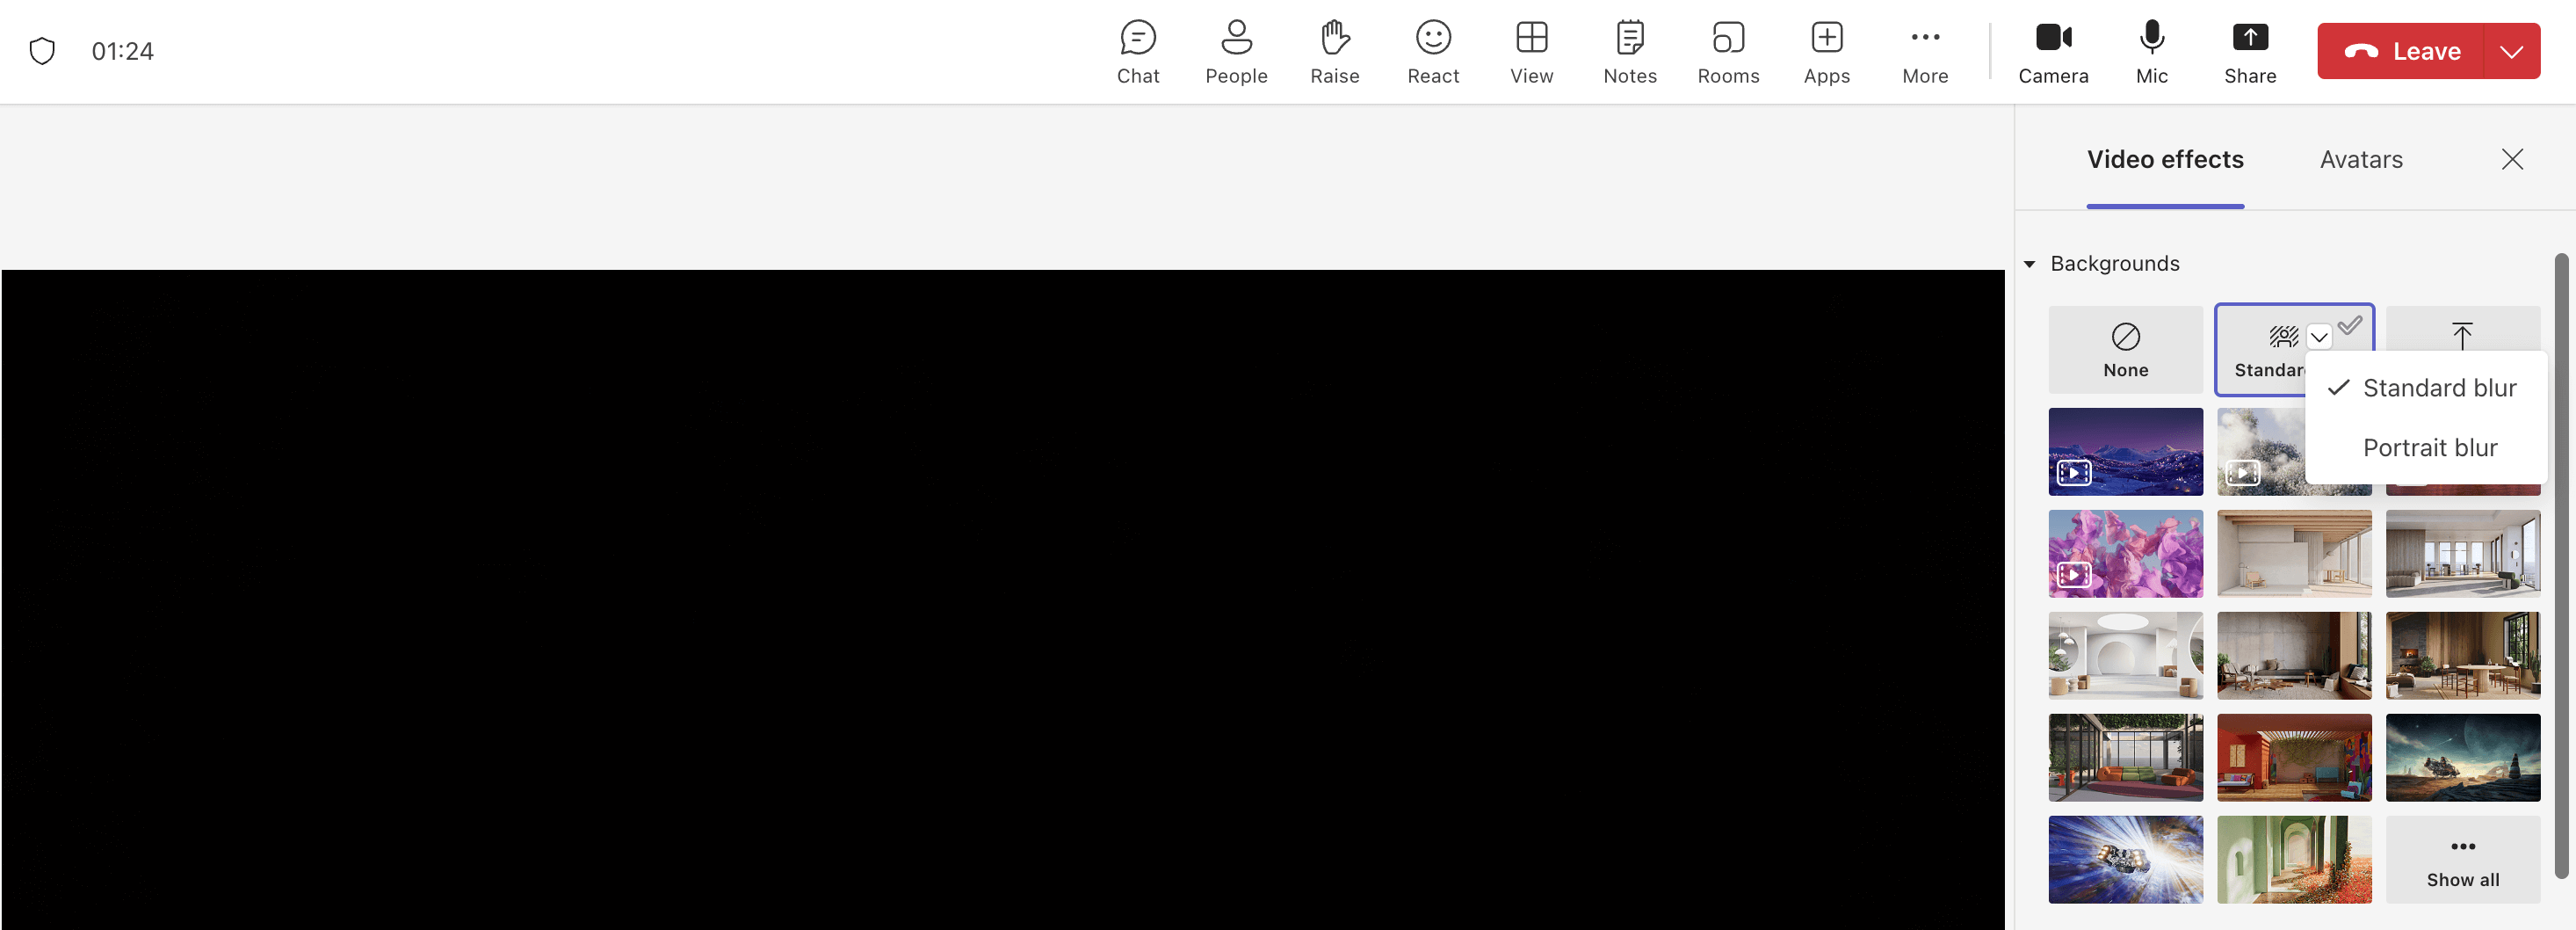
- Click on Video effects or Background filters (wording may vary by device).
- Choose Blur (you may see options like “Standard blur” or “Portrait blur”).
- Click Apply or Join now. Your background will now be blurred by default in all future meetings until you change it.
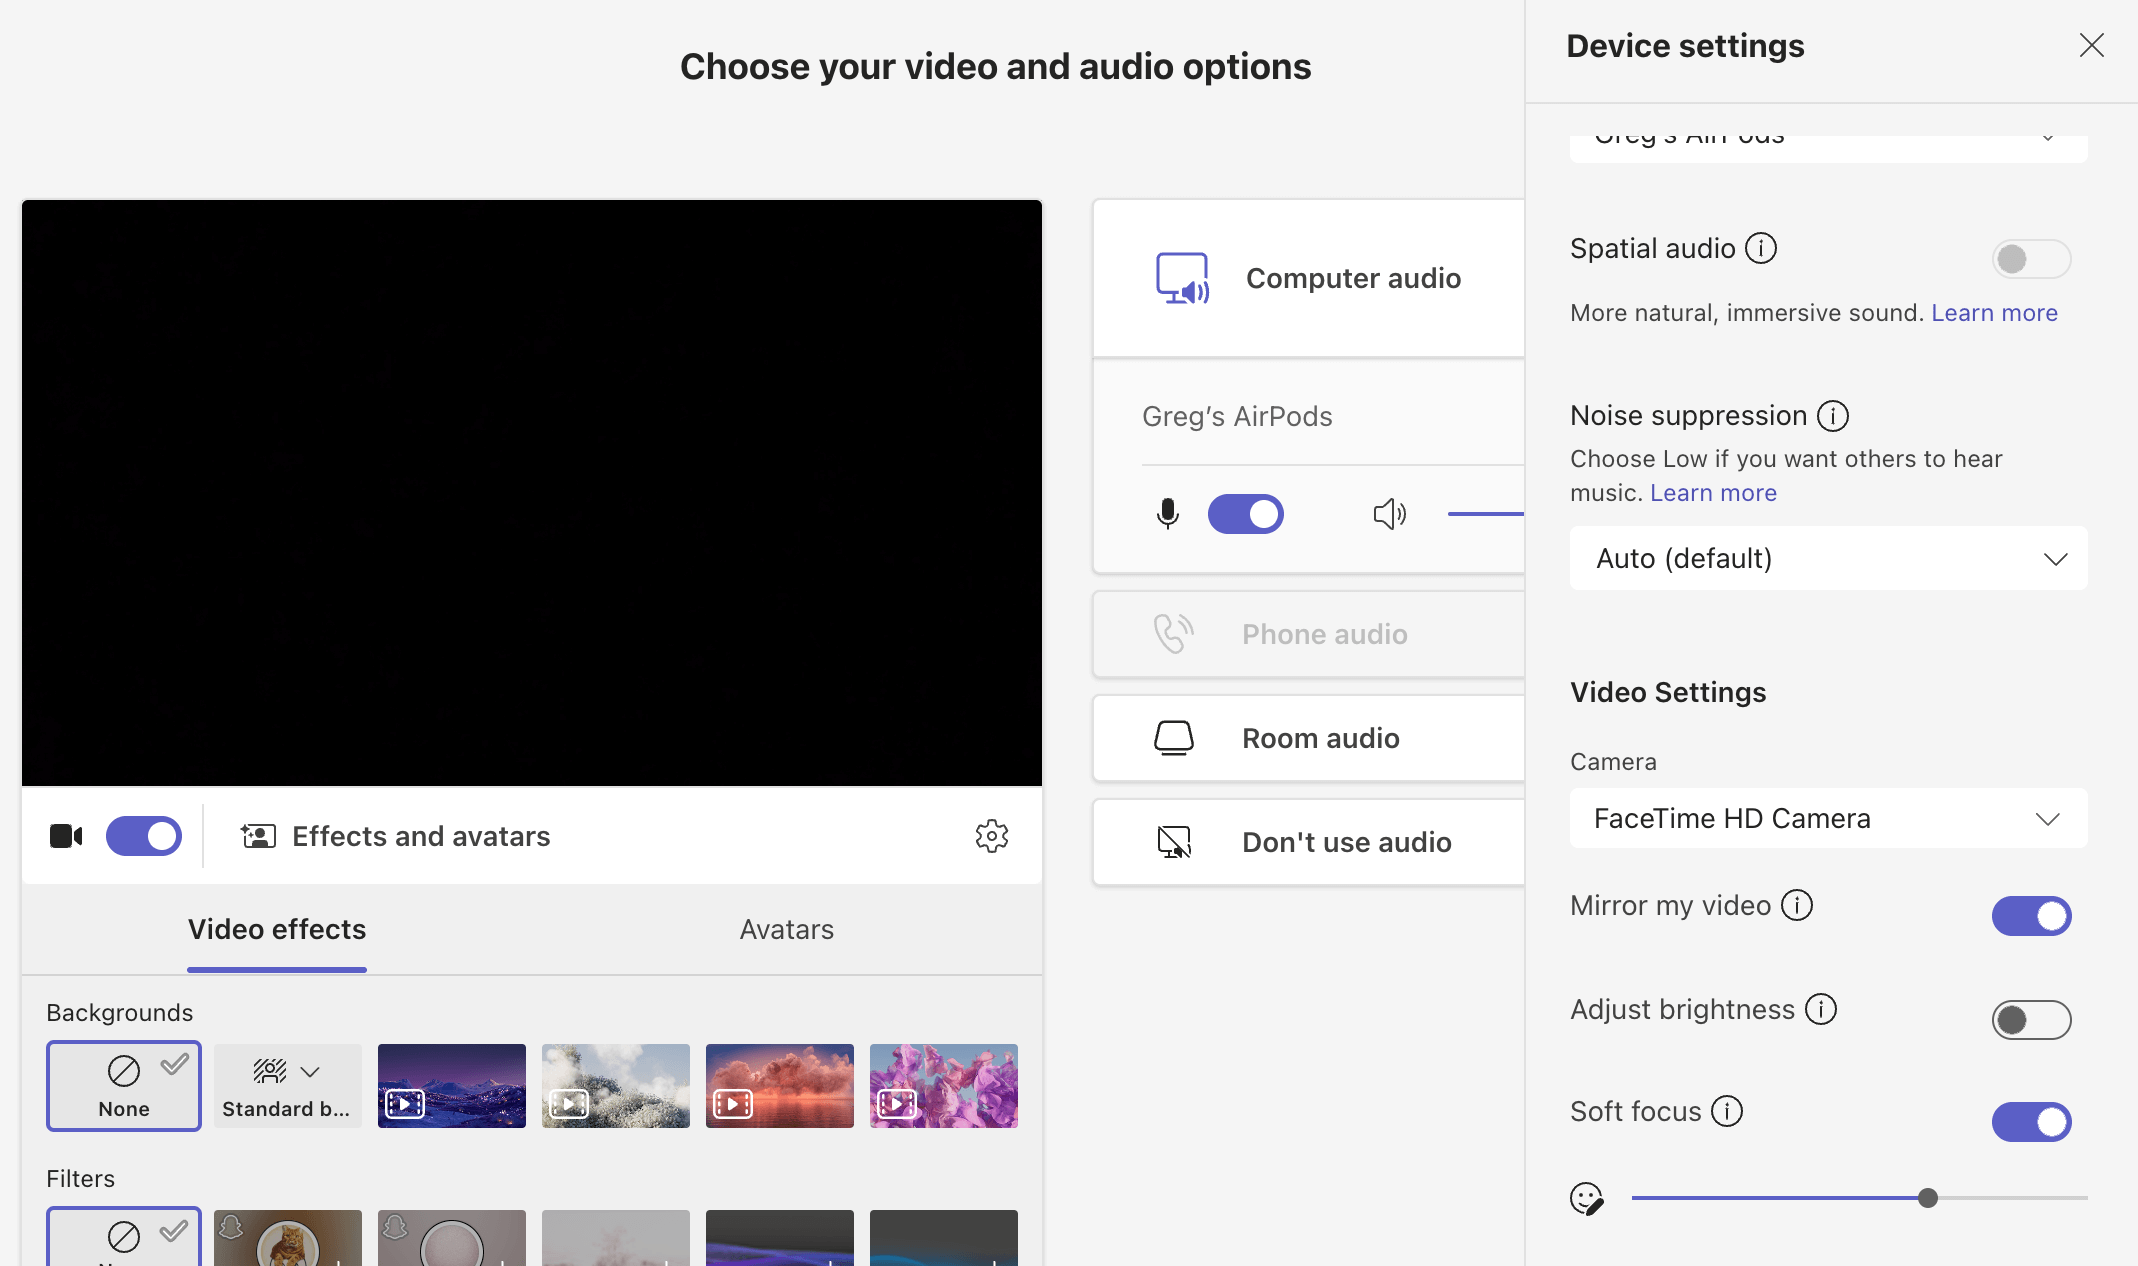
Steps to Blur Your Background During a Meeting
- In the meeting, click the More actions button (three dots) in the toolbar.
![]()
- Select Video effects and settings or Apply background effects.
- Choose Blur from the list of background options.
- Click Apply. The blur will remain active for future meetings unless you select a different background.
If you do not see the blur option, your device may not support it due to hardware limitations.
All Images Sourced From – OneDirectory
Also Read: Best MS Team Backgrounds For Women
Device-Specific Tips
- Windows & Mac: The process is identical. Use the desktop app for the best experience.
- Mobile (iOS & Android): Tap the three dots (More options) during a call, select Background effects, and choose Blur.
What are the limitations of using blur on different operating systems?

Windows
- Hardware Requirements: Requires a CPU with Advanced Vector Extension 2 (AVX2) support. Older or low-end devices may not display the blur option even if Teams is updated.
- Performance Impact: Real-time blurring consumes CPU resources, which may affect performance on less powerful machines.
- VDI Support: Background blur is not available when using Teams through optimized Virtual Desktop Infrastructure (VDI).
- Camera Compatibility: Issues may occur if using multiple or virtual cameras; sometimes the blur effect does not apply correctly until the active camera is changed in settings.
Mac
- Hardware Dependency: Similar to Windows, requires modern hardware for blur to function smoothly.
- Virtual Camera Issues: The Mac client may always apply blur, especially when using virtual cameras, leading to unintended blurring of shared content or app windows. This problem does not occur in the browser version.
- Resetting Blur: Some users have reported difficulty disabling blur once enabled in the native Mac client.
Check Out: 75 Funny Microsoft Teams Backgrounds
Linux
- No Native Support: Official Microsoft Teams clients for Linux do not support background blur.
- Browser Workarounds: Some users have had success using the Teams web app in Microsoft Edge or Chromium-based browsers, where blur may be available.
- Community Solutions: Open-source workarounds exist using virtual cameras and AI segmentation, but these are unofficial and may result in low frame rates, especially on non-GPU systems.
iOS (iPhone/iPad)
- Feature Availability: Background blur is supported, but may not be available on older devices or outdated app versions.
- Custom Backgrounds: Not all custom background features are available; blur is present but other effects may be limited.
- Default Setting: Users may need to re-enable blur for each meeting, as persistent default setting is not always supported.
Android
- Device Requirements: Requires Android 10 or later, and specific GPUs (Qualcomm Adreno 610+, Arm Mali-G71+, or Arm Mali-T720+).
- App Version: Teams mobile app must be version 1416/1.0.0.2021143402 or newer.
- Default Setting: Similar to iOS, blur may need to be enabled for each meeting rather than set as a persistent default.
- Hardware Limitations: Devices without supported hardware or older OS versions will not display the blur option.
Check Out: Microsoft Teams Tips & Tricks
Practical tips for customizing your virtual workspace in Teams
If you’ve changed your mind and like to customize your background instead of blurring it completely, follow these tips.
Customizing your virtual workspace in Teams helps you project professionalism, express your personality, and stay organized.
Here are actionable tips to enhance your Teams environment:
1. Personalize Your Background

- Choose a Professional or Fun Background: Select from Teams’ preloaded backgrounds or upload your own image (such as a company logo, favorite location, or themed design).
2. Use Together Mode and Immersive Spaces
- Together Mode: Place all participants in a shared virtual scene (like a café or auditorium) to foster engagement and a sense of presence.
- Immersive Spaces: Use 3D environments and avatars for more interactive meetings, especially for brainstorming or team-building sessions. Adjust environment settings to match the meeting’s tone (e.g., Lakehouse, Oasis).
3. Organize Teams, Channels, and Tabs
- Create Teams and Channels: Structure your workspace by project, department, or topic. Use channels to focus conversations and resources.
- Add Tabs: Pin essential apps, documents, or websites as tabs within channels for quick access (e.g., Planner, OneNote, SharePoint).
4. Integrate Apps and Workflows
- Embed Productivity Apps: Add apps like Planner, Forms, or third-party tools directly into Teams for seamless workflow integration.
- Custom Apps: Develop or add custom apps using Microsoft Power Platform or Teams Toolkit to tailor your workspace to your needs.
Check Out: What Can Your Employer See About You On Microsoft Teams?
5. Set and Share Your Work Location
- Update Work Location: Let colleagues know if you’re working remotely or in the office via your profile. This helps coordinate meetings and manage expectations.
- Recurring Work Plans: Set your weekly work location and hours in Outlook; changes sync with Teams automatically.
6. Adjust Notification and Theme Settings
- Notification Preferences: Fine-tune notifications for channels, chats, and mentions to reduce distractions.
- Switch Themes: Choose between light, dark, or high-contrast themes to suit your visual comfort.
7. Customize Your Avatar

- Create or Edit Avatars: In immersive spaces, design an avatar that represents you, adding a personal touch to virtual meetings.
Conclusion
Blurring your background in Microsoft Teams is a simple yet powerful way to maintain privacy and professionalism in every meeting.
Once activated, the blur effect stays on for all your meetings until you decide to change it, ensuring you’re always ready for a distraction-free video call, no matter your surroundings.
Additionally, you can also customize your background using a professional background image, especially if distraction and privacy aren’t an issue and you simply want to look professional to make a statement.
Enjoyed the post?


