The shift to virtual learning has made video conferencing platforms essential tools for educators worldwide.
Zoom has emerged as one of the most popular choices for online teaching, offering a comprehensive suite of features designed to facilitate interactive and engaging virtual classrooms.
This guide will walk you through everything you need to know to get started with Zoom as a teaching platform.
Let’s get on with it.
Getting Started with Zoom
Creating Your Account
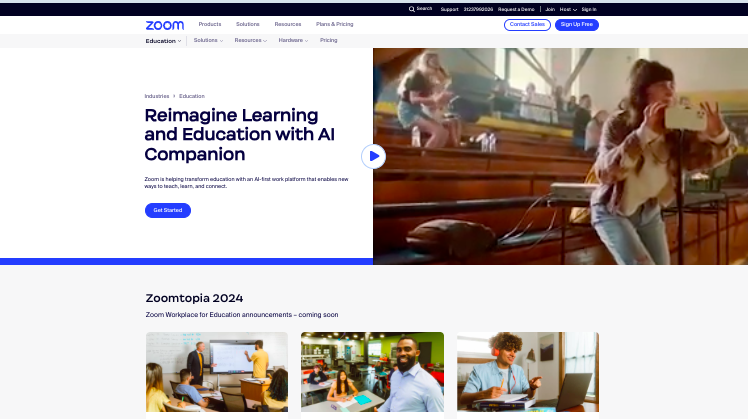
- Begin by visiting zoom.us and signing up for a free account using your email address.
Teachers can often access educational discounts or institutional accounts through their schools, which provide additional features and longer meeting durations.
- Once registered, download the Zoom desktop application for the most stable experience, though the web browser version works for basic functionality.
Also Read: Free Zoom Alternatives With No Time Limit
Understanding Account Types
- Zoom offers several account tiers. The free Basic account allows meetings up to 40 minutes with up to 100 participants, which works well for smaller classes.
- The paid accounts remove time limits and add features like cloud recording and admin controls.
Many educational institutions provide licensed accounts with advanced security and administrative features specifically designed for academic use.
Initial Setup and Profile Configuration
- After installation, complete your profile by adding a professional photo and your name as you want students to see it.
- Configure your default audio and video settings by accessing Preferences through the gear icon.
- Test your microphone and camera to ensure they’re working properly before your first class.
Explore: Best Zoom Alternatives For Podcasting
Setting Up Your First Virtual Classroom
Scheduling a Meeting
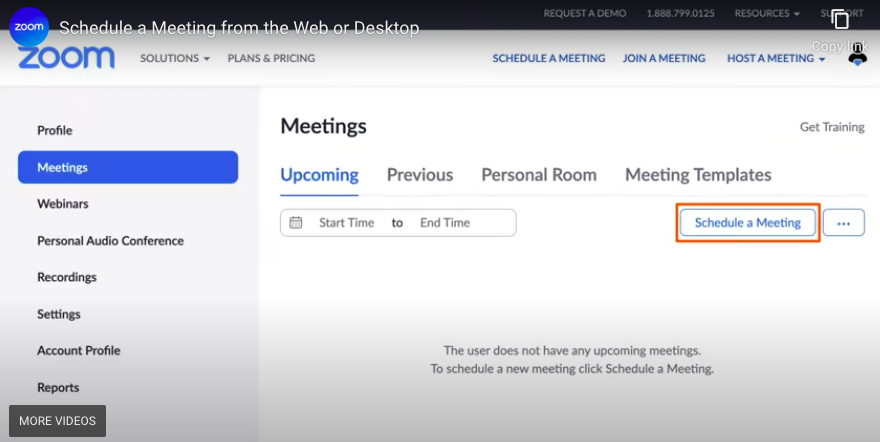
- Click “Schedule a Meeting” in the Zoom application to create your virtual classroom.
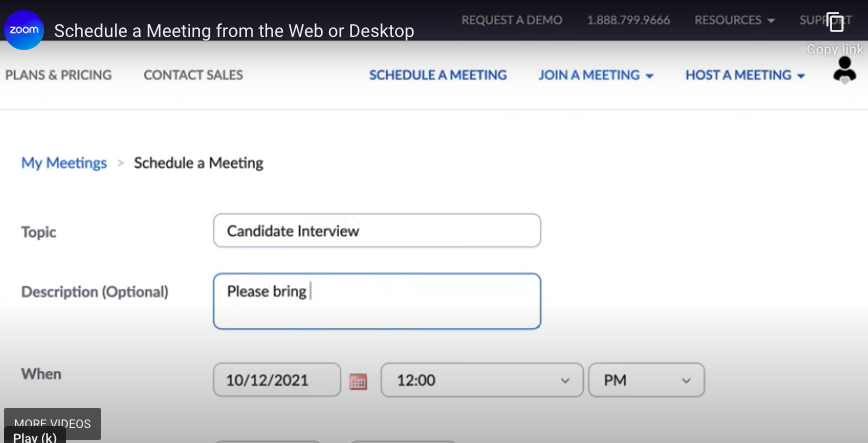
- Enter a descriptive meeting topic, select the date and time, and set the duration.
- Choose whether to require a meeting password and waiting room for security.
- Generate a meeting ID that you can reuse for recurring classes, making it easier for students to remember and join.
Also Read: Best Zoom Alternatives For Small Business
Configuring Meeting Settings
- Enable the waiting room feature to control when students enter your classroom.
- Set up meeting passwords to prevent unauthorized access.
- Configure participant permissions, such as whether students can share screens, use chat, or rename themselves.
These settings help maintain classroom order and prevent disruptions.
Sending Invitations
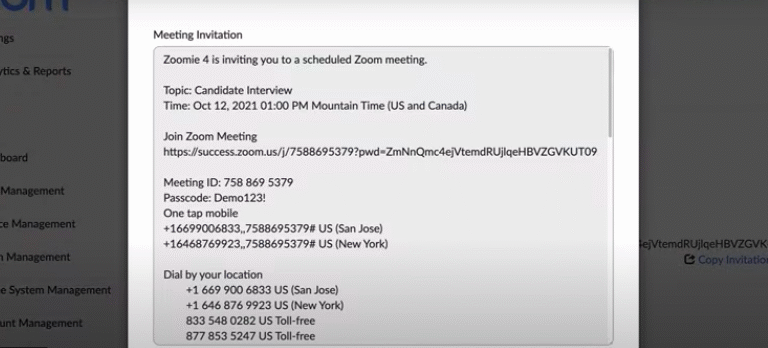
Zoom generates invitation links and meeting details that you can copy and share with students via email, learning management systems, or class websites.
- Include clear instructions about how to join, what materials students need, and any technical requirements.
- Send reminders before class begins to ensure good attendance.
Check Out: Zoom Meeting Etiquettes To Follow
Essential Features for Teaching
Though Zoom offers numerous features, the following prove handy for teachers.
Audio and Video Management
Master the mute and unmute functions for yourself and your students. Use the “Mute All” feature to eliminate background noise during lectures, and enable “Allow participants to unmute themselves” for discussions. Position your camera at eye level and ensure good lighting to maintain professional appearance and clear visibility.
Screen Sharing Capabilities
Screen sharing is crucial for presenting lesson materials, demonstrating software, or showing documents. Click “Share Screen” to display your entire desktop, specific applications, or individual files. Use annotation tools to highlight important information directly on shared content. Practice switching between different applications smoothly to maintain lesson flow.
Explore: Hacks To Look Good On Zoom
Chat Function
The chat feature serves multiple purposes in virtual classrooms. Students can ask questions without interrupting the lesson, submit quick responses to polls, or share relevant links. Configure chat settings to control whether students can message everyone or just the host. Monitor chat regularly and address questions at appropriate times during the lesson.
Recording Sessions
Recording capability allows students to review lessons later and helps absent students catch up. Start recording at the beginning of class and inform students they’re being recorded. Choose between local recording (saved to your computer) or cloud recording (stored on Zoom’s servers). Organize recordings in folders by subject or date for easy access.
Check Out: Best Webcams For Zoom Meetings
Managing Students and Participation
 Waiting Room Control
 Waiting Room Control
The waiting room feature lets you control who enters your classroom and when. Students wait in a virtual lobby until you admit them individually or in groups. Use this time to greet students personally as they arrive, creating a welcoming atmosphere. Admit students gradually to prevent technical issues from simultaneous connections.
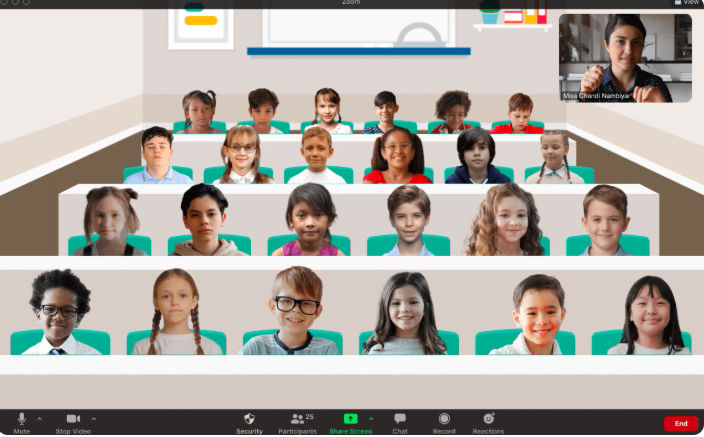
Participant Management
Monitor student participation through the participants panel, which shows who’s muted, has their camera on, and their connection status. Use features like “Raise Hand” to manage questions and discussions orderly. Rename participants if needed to maintain professional standards and help identify students clearly.
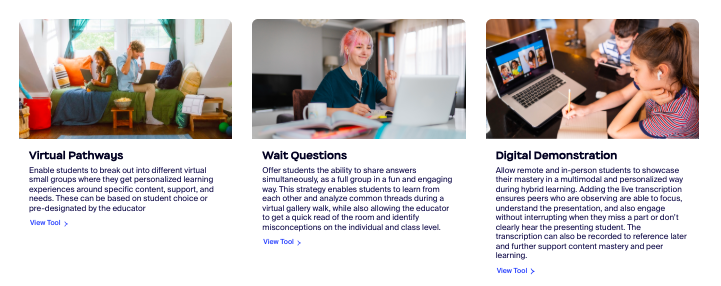
Breakout Rooms for Group Work
Breakout rooms allow you to divide students into smaller groups for collaborative activities. Pre-assign rooms or let Zoom distribute students randomly. Set time limits for group activities and broadcast messages to all rooms simultaneously. Move between rooms to monitor progress and provide guidance as needed.
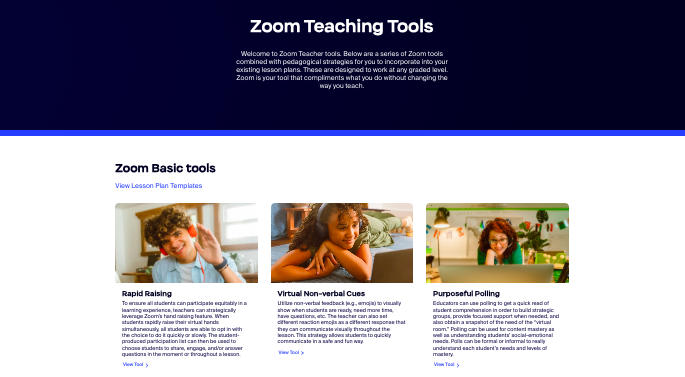
Polling and Engagement Tools
Create polls before class to gauge understanding or gather opinions on topics. Launch polls during lessons to maintain engagement and check comprehension. Use the whiteboard feature for collaborative brainstorming or problem-solving activities. These interactive elements help recreate the engagement of in-person learning.
Check Out: Zoom vs Google Meet
Classroom Management Best Practices
Establishing Virtual Classroom Rules
Create clear guidelines for virtual classroom behavior, including when to mute microphones, how to ask questions, and appropriate chat usage. Communicate these expectations at the beginning of each term and remind students regularly. Consider creating a visual poster with rules that you can share on screen.
Handling Technical Issues
Prepare for common technical problems by having backup plans. Keep phone numbers for key students who can help relay messages if your internet fails. Test all technology before class begins and have alternative lesson plans ready. Encourage students to join a few minutes early to resolve any connection issues.
Maintaining Student Engagement
Use various teaching methods to keep students active and focused. Incorporate frequent breaks during longer sessions, use interactive polls, and encourage camera usage to maintain visual connection. Vary your teaching pace and include multimedia elements to accommodate different learning styles.
Security and Privacy Considerations
Implement security measures to protect your virtual classroom. Use unique meeting passwords for each class and avoid sharing meeting details publicly. Enable waiting rooms to screen participants before admission. Consider locking meetings once all expected participants have joined to prevent unwanted interruptions.
Explore: Jitsi vs Zoom
Advanced Features for Enhanced Learning
Annotation Tools
Annotation features allow both teachers and students to draw, highlight, and add text to shared content. Use these tools during lessons to emphasize key points, solve problems collaboratively, or allow students to participate actively in presentations. Save annotated content for later reference or sharing with absent students.
Virtual Backgrounds and Filters
Virtual backgrounds help maintain privacy and reduce distractions from home environments. Choose professional backgrounds that don’t interfere with your visibility. Be mindful that some backgrounds may not work well with all computer systems or may affect video quality.
Integration with Learning Management Systems
Connect Zoom with your school’s learning management system (LMS) to streamline scheduling and access. Many LMS platforms offer direct Zoom integration, allowing students to join classes with single clicks from their course pages. This integration also helps with attendance tracking and grade management.
Cloud Storage and File Sharing
Utilize Zoom’s cloud storage capabilities for saving recordings and sharing resources. Organize files systematically and set appropriate sharing permissions. Consider using shared folders for ongoing projects or resource libraries that students can access between classes.
Also Read: Professional Zoom Backgrounds
Troubleshooting Common Issues

As with most online meeting tools, you may encounter technical issues sometimes. These are the most common issues most Zoom users face.
Audio and Video Problems
Address common audio issues by checking microphone permissions, adjusting volume levels, and switching between different audio devices. For video problems, ensure camera permissions are enabled, check lighting conditions, and verify that no other applications are using the camera. Keep audio and video drivers updated for optimal performance.
Connection and Performance Issues
Poor internet connection can cause dropped calls, frozen screens, or audio delays. Recommend students use wired internet connections when possible and close unnecessary applications to improve performance. Have backup communication methods ready, such as phone numbers or alternative meeting platforms.
Student Access and Login Issues
Help students troubleshoot login problems by providing clear setup instructions and having tech support contacts available. Create simple guides with screenshots for common issues. Consider holding brief orientation sessions to help students familiarize themselves with the platform before regular classes begin.
Recording and Playback Issues
Ensure recordings are properly saved and accessible to students who need them. Test playback quality and consider providing transcripts for students with hearing difficulties. Organize recordings systematically and maintain them according to your institution’s data retention policies.
You can go through their Troubleshooting guide for other issues you’re facing.
Discover: Clothing That Make You Look Professional On Zoom
Conclusion
Mastering Zoom for virtual teaching requires practice and patience, but the platform offers powerful tools for creating engaging online learning experiences.
Start with basic features and gradually incorporate advanced capabilities as you become more comfortable.
Remember that successful virtual teaching depends not just on technical skills, but also on clear communication, student engagement strategies, and adaptability to changing circumstances.
Enjoyed the post?