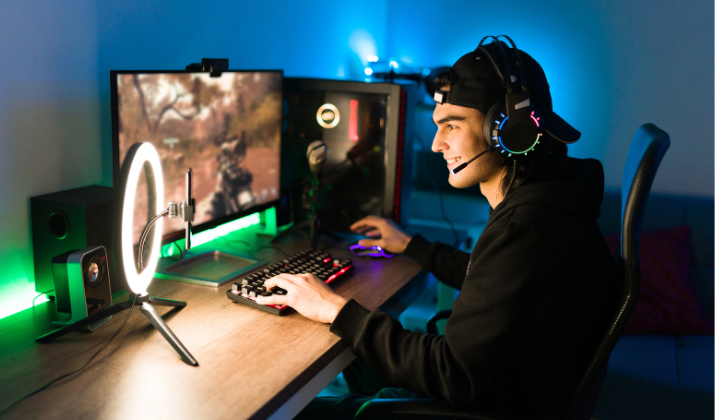
Are you looking for an affordable video game console but don’t want the Nintendo Switch? The Nintendo Switch is not a bad video game console, but it’s lacking in several areas.
For example, it doesn’t have as much storage space as you might like, and the graphics could also be improved. It’s not the most durable video game console either, nor does it support the largest selection of games.
Alternatively, you may not be looking for a high end, more expensive video game console but rather a cheaper video game console because you can’t afford the Switch or don’t want to pay that much money for your first console.
Regardless of why you are looking for a Nintendo Switch alternative, this article has something for you.
We’ll be focusing on video game consoles from Amazon, which will allow you to find products at more affordable prices.
Also Read: Best TV Stands For Video Game Consoles
Amazon Renewed Products
Most of this article will focus on handheld video game consoles similar to the Nintendo Switch rather than consoles you hook up to a TV or computer. First, though, let’s talk a bit about renewed products on Amazon and what they mean, because quite a few items on this list are Amazon Renewed products.
One of the advantages of buying products from Amazon is that you can purchase renewed versions of electronic products released a few years back.
Renewed products are similar to refurbished products, but they are refurbished and guaranteed by Amazon. Amazon’s verified vendors have inspected the product and tested it to ensure it works properly.
They are in excellent condition, while refurbished products on eBay, for example, may simply be refurbished by the seller, so quality can vary greatly.
A renewed product from Amazon will not have any screen or body damage visible from 12 inches away, and the batteries will have a capacity of at least 80% of what a new battery would have.
Furthermore, there is a 90-day refund guarantee, allowing you to get a refund or replacement within 90 days if it doesn’t work as expected.
Since we will be looking at several renewed products in this list, I thought that introduction was necessary. With that being said, let’s get into the article.

Also Read: Can You Track A Nintendo Switch?
Best Nintendo Switch Alternatives You Should Try
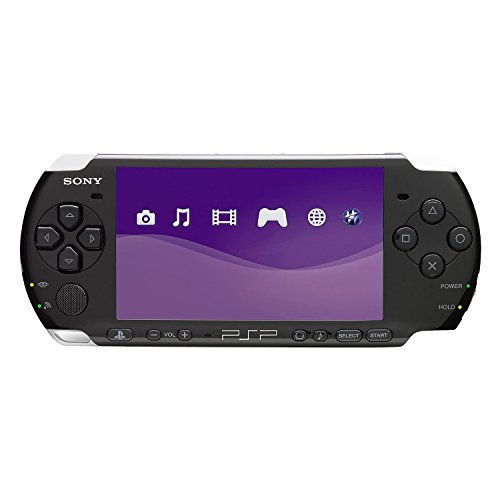
1. Sony Playstation Portable PSP 3000 Series
 (Black)")
The first alternative that we will look at is the PlayStation Portable. How does it compare to the Switch?
There are crucial differences between these two handheld video game consoles, one of the main ones being the specific games available on each. Some people might simply prefer the PSP’s games, but overall, a significant advantage of the PSP is that buying new individual games is usually a lot cheaper than on the Switch.
While the PSP 3000 was released in 2008, there are other versions of the PSP that were released earlier (as far back as 2004). If you used to play on a PSP, you might find it nostalgic to go back and use it again.
Compare it to the Nintendo Switch, which was released in 2017. Many people believe that the PSP is the original Switch; it certainly was a precursor, and although battery life and some other features leave a lot to be desired, the PSP is a solid choice that has withstood the test of time.
Of course, you want to make sure you’re getting a PSP 3000 that works well, which is why you should buy from a trusted source, such as Amazon Renewed.
Explore: Best Steam Alternatives For PC Gaming
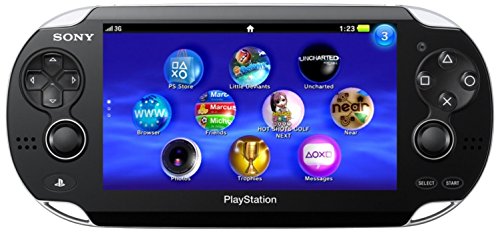
2. PSP Vita 2000 (Renewed)
")
Another solid alternative to the Nintendo Switch is the PSP Vita. This PlayStation product was released in 2014 originally, and it comes with dual analog sticks for better precision.
There are around 1,000 games available, and the OLED screen offers excellent graphics. Note that this is one thing that sets the original PSP Vita apart from the later Vita Slim.
The original Vita (this one) has an OLED screen, while the later version, the Slim, has a cheaper screen that kind of falls short when it comes to graphical quality.
Back to the games – you can also play PSP games, PS Mobile games, PS One classics, and more.
In other words, the selection of available games is one of the best things going for the Vita and one of the reasons to choose it over the Switch, especially given that many of the games are discounted and available for relatively cheap.
Note that it doesn’t come with the PS Vita memory card, but I recommend buying it separately.
Check Out: Best Anno Games
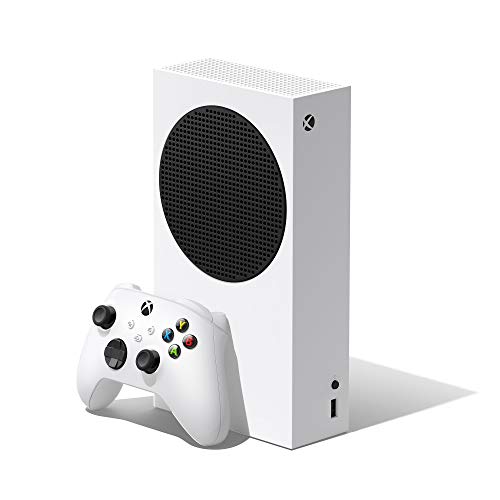
3. Microsoft Xbox Series S 2021 (Renewed)
")
One of the things that will stand out when looking at the Xbox Series S is the much larger storage space available. With 512 GB of storage, the Switch is no match for the Xbox Series S.
Besides, the quality is impressive as well, with 120 fps. With a resolution of up to 1440p, it also beats the Switch, which has a maximum resolution of just 1080p; the Xbox Series S also offers 3D surround sound.
You will also get access to hundreds of titles from four generations of Xbox, which is also a plus if you are frustrated by the titles available on the Switch.
Also Read: Webopoly Reviews, Alternatives, History
4. Game Boy Advance (Renewed)
")
If you buy the Game Boy, you will be really taking a walk down memory lane, so I only recommend it as an alternative to the Switch if you are looking for a more retro experience.
The original Nintendo Game Boy video game console preceded the Switch – it was first released in 1989, using physical game cartridges. The Game Boy Advance, which we will be discussing here, was released in 2001, so it still offers a retro experience for those who want a bit of nostalgia.
Fortunately, it is available from Amazon Renewed, with an improved graphical experience compared to previous versions of the Game Boy and a 50% bigger screen than the Game Boy Color.
It uses a pair of simple AA batteries, which you can purchase from any convenience store or supermarket, making it a lot easier to replace the batteries when needed compared to the Switch. Furthermore, it boasts a remarkable battery life of 15 hours, which is possible due to the limited hardware of the Game Boy.
One of the challenges of buying it would be finding games for it, although you can find them online on sites like eBay. If you had a Game Boy as a kid, you might be able to find all games that fit the Game Boy Advance by digging through your attic.
Check Out: Best Games Like Okami
5. Daxceirry WIN600 Video Handheld PC Game Console (Win 10 Edition)

The Daxceirry WIN600 handheld game console was released in 2022, so you can buy it new from Amazon. Running on Windows 10, it allows you to play computer games on the console, and it also supports Steam OS.
If you don’t like the idea of a refurbished product and would rather buy something new, this is a good choice.
It has a wide 5.94” OCA screen with great graphics.
Not only that, but you can even download office software on this small console. It weighs just 490 grams, so you can carry it around with you effortlessly, and the ability to download office software just means that you can do your work more efficiently while on the go or while relaxing on the couch.
It supports all kinds of games, including PC, PS3, PSP, WII, and many other games. This versatility and the access to so many game stores are definitely some of the strong points of this handheld console.
The fact that you can have Windows OS and Steam OS in a handheld console is a shock for many. Of course, the operating system will be limited by the hardware – it’s a handheld game console, not a powerful PC or TV monitor, so many games may not play as they would on a larger device.
Nevertheless, it really is a game changer. It’s best for 2D games or older 3D games, as high-performance games will not work as intended due to its limited hardware, as those games are designed for more powerful devices.
Check Out: Best Games Like Omori
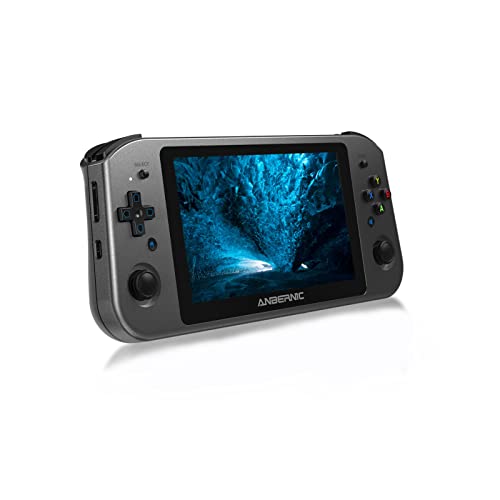
6. Retroid Pocket 3 Retro Game Handheld Console
")
This is an affordable Android retro game console that makes an excellent alternative to the Switch if you are looking for something cheap. It comes with 2 GB of RAM and a rechargeable 4000mAh battery.
Since it runs on Android, you can download Android APKs, which is definitely one thing going for it. It is possible to run Android on Nintendo Switch, but not through official methods.
However, the best thing going for this is that it is an emulator with the ability to emulate different platforms. You can emulate Dreamcast, PSP, Nintendo 64, and even some GameCube games.
In addition to Android APK games, you can also use Steam Link and Moonlight and emulate Steam, Xbox, and WII games. However, they may not work well, and from user reviews, it is clear that you need to do quite a bit of tinkering and configuration to get it to emulate different platforms, but it can be pretty powerful once you figure it out.
The console comes in several colors, and it comes with a 4.7-inch IPS HD 16:9 LCD screen. In addition to offering Wifi connectivity, it allows you to connect it to a TV monitor with an HDMI cable, playing on the console while displaying the game on your PC.
All in all, if you like Android games and want to play them on a handheld console with physical buttons you can press, which you can’t get when running them on your phone, this is a good option.
Also Read: Best Games Like Elden Ring On Switch
7. Logitech G Cloud Handheld Portable Gaming Console

While not the cheapest Android video game console out there, this one is definitely one of the best. With a seven-inch screen and 1080p graphics (and a 60Hz refresh rate), it is a quality console that offers an enjoyable and solid experience.
It supports the Google Play Store, but even more than that, it supports multiple cloud gaming services which includes NVIDIA GeForce Now, and Xbox Cloud Gaming. With cloud gaming, there is no need to download games and use up precious storage space as long as you have a stable Wifi connection.
You can also use it with the Xbox Remote Play app and the Steam Link app.
From the Google Play Store, you can download social media apps and other apps as well.
It weighs around 460 grams, and it has a strong battery that can last 12 hours or more, depending on usage, making it a great portable console.
Check Out: Best Games Like Roblox
8. GameSir X2 Pro-Xbox Mobile Game Controller for Android Type-C
, Phone Controller for xCloud, Stadia, Luna - 1 Month Xbox Game Pass Ultimate -Passthrough Charging (White)")
This is an interesting alternative to the Nintendo Switch because it is simply a device that attaches to your existing Android phone and turns it into a video game console with physical buttons you can press while playing mobile games. As such, it is pretty cheap, making it an affordable choice for those on a strict budget.
It is officially licensed by Xbox, and it supports not only Xbox Cloud Gaming but other services too including NVIDIA GeForce Now, Stadia, & Amazon Luna. Not only that, but you will get a complementary month of Xbox Game Pass Ultimate when you purchase this product.
Depending on your phone model, it may support pass-through charging, allowing you to charge your phone while you have the video game controller attached.
Important note: Make sure your phone is compatible before buying this product! According to the product page, it is compatible with Android phones that have a Type C charger (100-179 mm, or 10 to 17.9 centimeters, only).
Also Read: Best Slope Games Alternatives
9. Daxceirry RG552 Handheld Android System Game Console With 16G Linux System
")
This particular handheld video game console comes with support for both Android and Linux operating systems and games. It has a powerful CPU that is designed to handle Android and Linux games while offering outstanding performance.
It also comes with various emulators built in, allowing you to play WII, Dreamcast, GameCube, N64, Saturn, and many other games. According to users, it actually performs well – of course, not all games will work properly, but quite many do, although your mileage may vary.
In addition, the physical materials are high quality, there is a good battery with excellent battery life, and the product comes with a one-year warranty.
Explore: Can PS4 Play Blue Ray Disk?
10. AYANEO Air Handheld PC Game Console
")
The AYANEO Air is an ultra-thin PC gaming console running on Windows. What sets it apart from cheaper gaming consoles is its power – it has a powerful AMD Ryzen 5 5560U processor with 6 cores and 12 threads and an integrated AMD Radeon graphics suite.
Thus, it provides excellent performance and speed coupled with amazing graphics, making it well worth the price.
It also has impressive storage – this version has 512 GB, much more than the Switch.
I was impressed by the engineering of this device. It is ultra-thin, with only two screws on the visible part of the main body, and the screen is super responsive as well.
If you are looking for a high-quality Windows game console, this is it!
Explore: Best Steam Link Alternatives
11. DREAMHAX RG351P Handheld Game Console With 64G TF Card
")
This handheld game console runs on an open-source system that supports more than 20 different types of game formats. It allows you to preload more than 2,500 games.
The console screen is made of tempered glass that has anti-shatter and anti-scratch protection. The battery can last for up to eight hours, and the sound system is pretty good as well.
The console is very affordable, but that means that specific emulations will be limited due to limited hardware capabilities. There is only so much you can do with a $99 video game console, but it is still an excellent entry-level console for those on a budget.
Also Read: Best Joy2Key Alternatives
12. Steam Deck

Can you find a Steam Deck on Amazon? You sure can!
It is available both new and used from various sellers. You may want to buy from Amazon instead of the official Steam site for one of three reasons.
- You are looking for a used Steam Deck, which will likely be cheaper than a new one.
- You have an Amazon gift card, and you can’t use it on the official Steam store.
- You want financing. Amazon offers financing through Affirm or the Amazon Rewards Visa Card. If you are approved for the Card, you can make payments over 18 months with no APR; with Affirm, you may have to pay interest.
In either case, the Steam Deck is one of the best alternatives to the Switch on the market. You can get Steam on a handheld device, just like you would on your PC.
Compared to the Switch, the Steam Deck has both pros and cons. On the one hand, it is heavier and not as portable, and the battery life doesn’t tend to be as good.
On the other hand, it is a lot more powerful – and it gives you access to Steam games, which is one of the deciding factors for many people who prefer the Steam Deck.
Not only is the Steam Deck a good choice for PC gamers, but it also offers superior graphics compared to the Nintendo Switch. Yes, it’s bigger and heavier, but that allows it to have superior hardware as well.
If you already own Steam games that you play on your PC and are looking for a handheld addition to your gaming arsenal, the Steam Deck is a good choice. It is important to note, however, that not all the games you have on your PC will work on the Steam Deck – most Steam games work, but not all.
There are over 5,000 games that have been verified to work on the Steam Deck, though, which is a pretty large number!
13. Nintendo Switch Lite

The Nintendo Switch Lite remains an excellent alternative to the original Nintendo Switch. I would say it is a good alternative to the Switch mainly if you are looking for something more affordable and portable.
Most notably, the Switch Lite is a handheld-only device. It can not be connected to your TV like the original Switch can.
Nintendo negotiated with the manufacturers it works with to be able to produce this version of the Switch, costing less than $200 for a new one. It is smaller and lighter than the Nintendo Switch, so it is more portable.
Most of the games you love on the Switch are available on the Switch Lite as well. However, some are not, as they may require a Joy-Con, while the Switch Lite only uses buttons on the actual device and doesn’t come with Joy-Con support.
If you are a casual gamer only planning to play in handheld mode, the Switch itself might be overkill. The Switch Lite is probably a good choice, as it will allow you to save money.
For gaming on the go, the Lite is also the superior choice, as it offers better portability. It will be easier to fit into your pocket, purse, etc.
The Lite is the perfect choice if you want the Switch but are looking for something that is easier to carry and cheaper. It comes in several colors, such as blue, gray, and yellow.
Explore: Best Oculus Alternatives
14. 777 Retro Game Console – Classic Mini Video Game System

I really love this one. It’s an incredibly affordable video game console that connects to modern TVs but includes hundreds of old, classic games that will remind you of your childhood.
This old-school 8-bit console comes with 777 classic games built-in. You don’t need any cards or an internet connection; simply use the cables that come with it to connect it to your TV or computer.
The simple four-button controller is easy to use. Whether you are playing Pac-Man or some other classic game, go back in time with this fun console that costs practically nothing.
Check Out: Best Poki Alternatives
Wrapping It Up
As you can see, there are a lot of options you can try instead of the Nintendo Switch. I love the renewed versions of classic handheld consoles, such as the PSP 3000, but some newer alternatives that allow you to emulate other games are interesting as well.
The Switch Lite remains a good choice if the main reason you were looking for an alternative was increased portability or reduced cost.
There are also classic options as well, such as the Game Boy Advanced or the 777 Retro Game Console, to take you down memory lane and get a whiff of the past.